 Save
Save The first time I made crème brûlée, I was convinced it would be impossible—too fancy, too French, too many things that could go wrong. But then I remembered my grandmother mentioning that the best desserts are often the simplest, and something about that stuck with me. I gathered three ingredients on a quiet Sunday afternoon and decided to just try. When that torch flame hit the sugar and it crackled into caramel, I understood why this dessert has endured for centuries. It's not about complexity; it's about the magic of transformation happening right in front of you.
I made this for my partner on our anniversary, and watching their face when they heard the torch was part of the dessert itself—the sound, the smell of caramelizing sugar, the theater of it all. They'd never had homemade crème brûlée before, and suddenly this fancy French dessert felt like the most personal gift I could offer. It became our thing after that, something we'd make together on special occasions, taking turns with the torch and taste-testing until we got the caramel color just right.
Ingredients
- Heavy cream (2 cups): This is your base, and using the richest cream you can find makes all the difference—don't settle for light cream or you'll lose that luxurious mouthfeel.
- Egg yolks (4 large): The yolks are what create the custard's silky texture, so don't skip the sieving step or you might end up with bits of cooked egg white.
- Granulated sugar (1/2 cup plus 4 tablespoons): Sugar sweetens the custard and creates the crisp topping, and having extra on hand means you won't panic when it's time to brûlée.
Tired of Takeout? 🥡
Get 10 meals you can make faster than delivery arrives. Seriously.
One email. No spam. Unsubscribe anytime.
Instructions
- Heat the cream gently:
- Pour your cream into a saucepan and turn the heat to medium, watching until it begins to steam. You'll know it's ready when tiny bubbles form around the edges and you can see the steam rising, but never let it actually boil or you'll scald it.
- Whisk yolks and sugar:
- In a separate bowl, whisk your egg yolks with the sugar until the mixture turns pale and ribbony—this takes about 2 minutes and is your insurance against scrambled eggs later.
- Temper the eggs:
- Slowly pour the warm cream into the egg mixture while whisking constantly, adding just a thin stream at first so the eggs warm gradually without scrambling. This is the moment where patience really matters.
- Strain for silk:
- Push your custard mixture through a fine sieve into a measuring cup or bowl, which catches any cooked egg bits and gives you that restaurant-quality smoothness.
- Fill the ramekins:
- Pour the custard evenly into four 6-ounce ramekins, filling them almost to the top.
- Create a water bath:
- Place the ramekins in a deep baking dish and pour hot water around them until it comes halfway up their sides—this gentle, moist heat is what keeps the custard creamy instead of rubbery.
- Bake with care:
- Bake at 325°F for 30 to 35 minutes, pulling them out when the edges are set but the very center still jiggles slightly when you tap the ramekin. This slight wobble is key.
- Cool and chill:
- Let the ramekins cool to room temperature, then refrigerate for at least an hour, though up to two days is even better and actually improves the flavor.
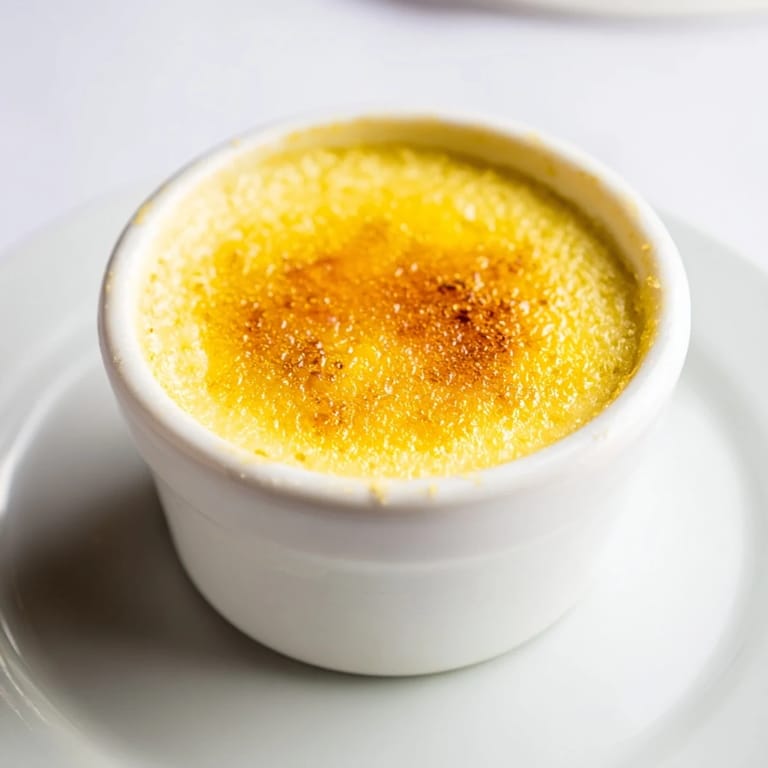
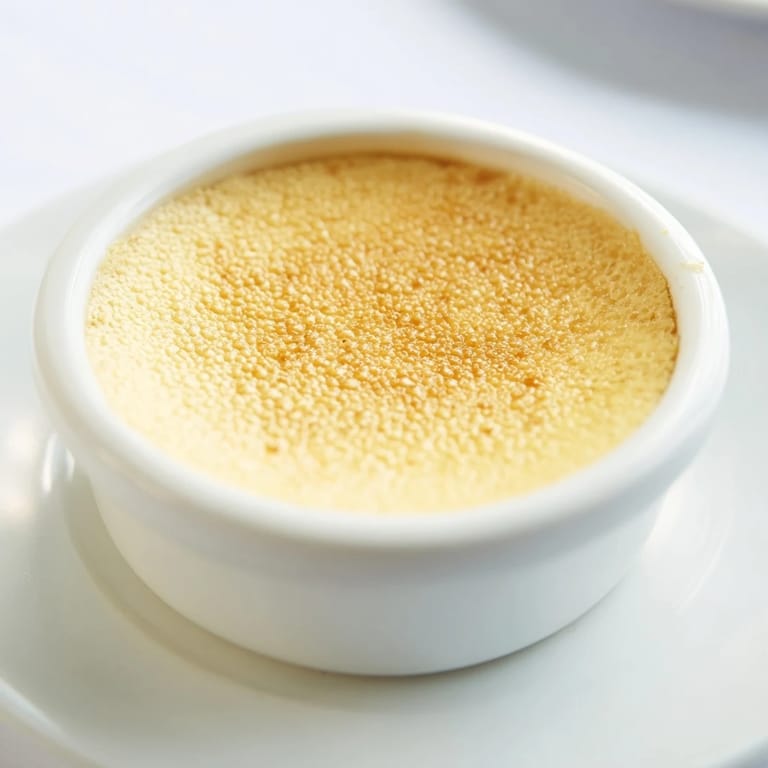
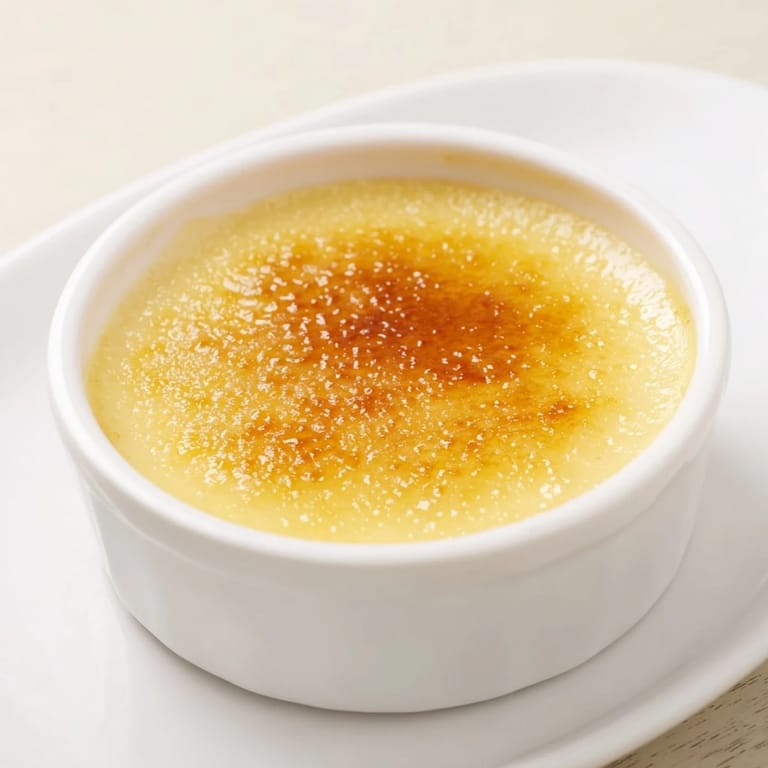
- Brûlée the top:
- Sprinkle a tablespoon of sugar evenly over each custard and use a kitchen torch to melt and caramelize it until it's deep golden and crisp, letting it cool for a minute or two so the sugar hardens into a crackly shell.
 Save
Save The crackle sound when you tap the spoon against the caramelized sugar is oddly satisfying, and my favorite part is watching someone's eyes light up the first time they experience that combination of crispy top and creamy custard. It's the kind of dessert that feels like you've done something truly special, even though you really only did three things right.
Why This Recipe Changed How I Think About Cooking
Before crème brûlée, I thought fancy cooking meant more ingredients and complicated techniques, but this dessert taught me that restraint is actually harder and more elegant than abundance. When you have only three ingredients, every single one has to count, and you can't hide behind complexity. I started applying this philosophy to other dishes and found that the best meals are often the ones where nothing is wasted and everything is intentional.
Flavor Variations Worth Exploring
Once you nail the basic recipe, infusing the cream opens up a whole world of possibilities without adding complexity. I've had success steeping vanilla beans in the cream for 20 minutes before heating it, and the lavender version I made last summer was unexpectedly magical. Even just adding the zest of a lemon or orange into the cream while it heats transforms the whole dessert into something new, and you're still working with just a few ingredients.
Tools and Torch Talk
A kitchen torch is genuinely one of my favorite kitchen tools now, and once you have one, you'll find yourself brûléeing everything from fruit to cheese. If you don't have a torch, a very hot oven broiler works fine—just watch it obsessively because the sugar can go from perfect to charred in about 30 seconds under direct heat. The torch gives you more control and honestly makes you feel like you're doing something a little bit magical.
- A kitchen torch costs about as much as takeout dessert and lasts forever, making it genuinely worth the investment.
- Practice the torch motion on a test custard first so you don't panic when there's sugar in front of you.
- Always let the caramelized sugar cool for a minute before serving, or you'll burn your mouth in the most preventable way.
 Save
Save Crème brûlée is proof that sometimes the most elegant things in life are built on simplicity and technique rather than endless ingredients. Make it, share it, and let the crack of that caramelized sugar speak for itself.
Recipe Guide
- → What are the key ingredients for this dessert?
Heavy cream, egg yolks, and granulated sugar come together to form the silky custard and caramelized topping.
- → How is the custard baked evenly?
The custards are baked in a water bath which gently cooks them to a smooth, tender texture without curdling.
- → What technique is used for the crisp topping?
Caramelizing granulated sugar with a kitchen torch or under a broiler creates a hard, golden crust.
- → Can this dessert be prepared in advance?
Yes, the custard can be chilled for up to two days before caramelizing the sugar just prior to serving.
- → Are there any suggested garnishes?
Fresh berries or a sprig of mint add a fresh, vibrant touch alongside the rich custard.