 Save
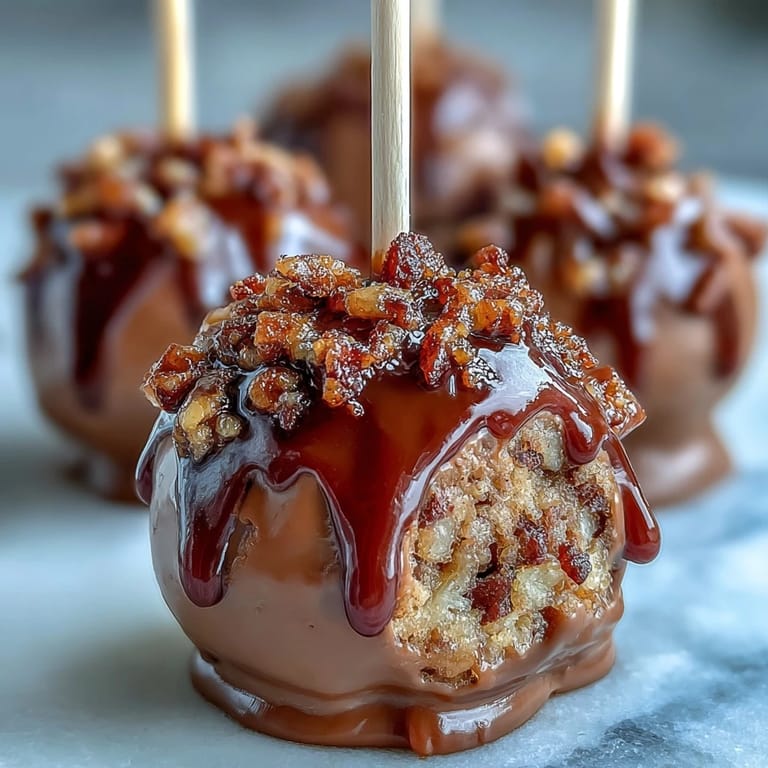
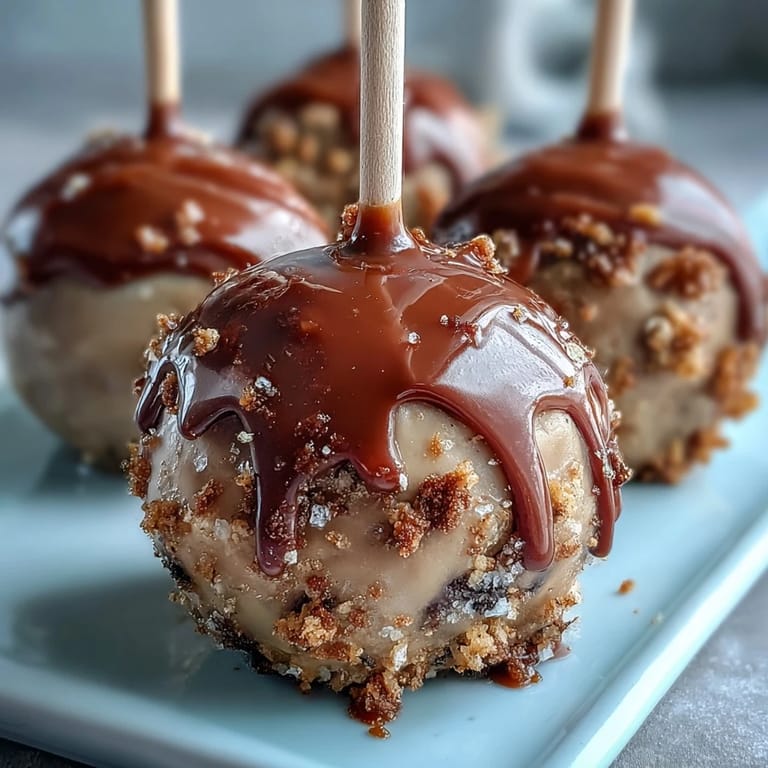
Save My friend texted me two weeks before graduation asking if I could make something special for the celebration party, and honestly, cake pops felt like the perfect answer. There's something about those little spheres of cake and frosting dipped in color that just screams celebration without requiring you to be a pastry chef. I'd never made them before, but watching my cousin frost cupcakes one afternoon gave me the confidence to try something a bit more ambitious. The idea of making them in school colors felt like such a natural fit for marking such a big milestone.
I'll never forget setting up that Styrofoam block on the kitchen counter and watching the first batch of pops dry under the overhead lights. My mom kept peeking over my shoulder making comments about how professional they looked, and even though I'd made a few mishaps with the dipping technique, there was something deeply satisfying about seeing them lined up like little edible soldiers. When I brought them to the graduation party, watching people's faces light up seeing their school colors gleaming with gold was worth every sticky finger moment.
Ingredients
- Vanilla or chocolate cake mix: The base of everything, and honestly using a box mix is the smart move here because you get consistent results without the extra fuss.
- Unsalted butter: Softened butter creams properly into the frosting and gives you that smooth texture that holds the cake balls together.
- Powdered sugar: This is what binds everything and creates that sweet frosting layer that helps your cake balls stick together.
- Milk and vanilla extract: These two ingredients are what make your frosting taste like actual frosting instead of just sweet powder.
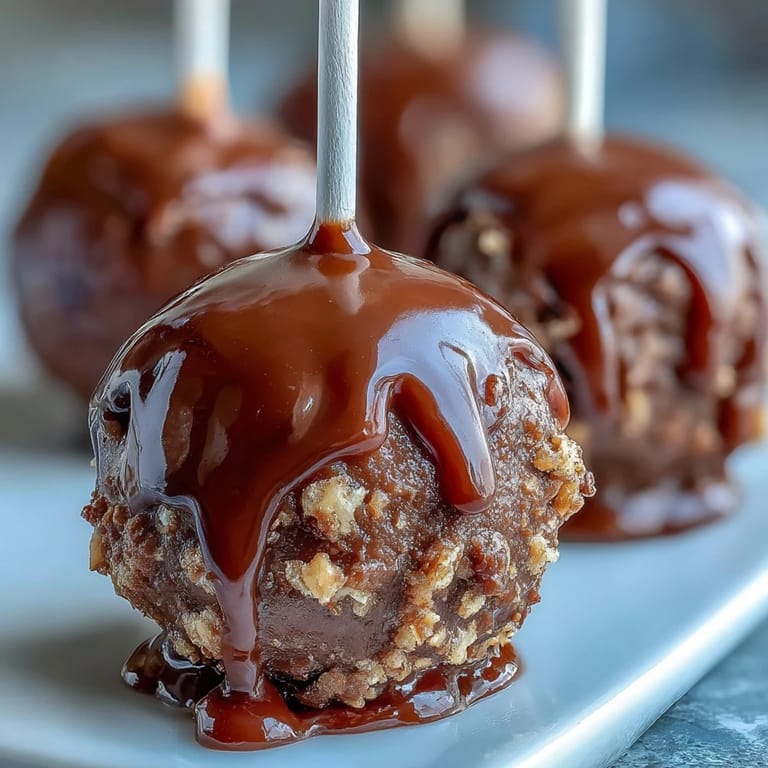
- Candy melts in school colors: The real star of the show here, and having two distinct colors lets you create that split-dip effect or alternate them for visual interest.
- Vegetable shortening or coconut oil: This is optional but honestly a game changer because it makes the candy melts thinner and easier to dip without creating thick clumpy coatings.
- Gold sprinkles or edible gold glitter: Applied while the coating is still wet, these catch the light and make everything feel extra celebratory.
- Lollipop sticks and Styrofoam block: The sticks give you something to hold onto while dipping, and the foam block is basically your drying station.
Tired of Takeout? 🥡
Get 10 meals you can make faster than delivery arrives. Seriously.
One email. No spam. Unsubscribe anytime.
Instructions
- Bake your cake:
- Follow the box instructions and bake until a toothpick comes out clean, then let it cool completely on the counter. Rushing this step means warm cake that won't hold together properly when you mix it with frosting.
- Whip up the frosting:
- Start with soft butter and beat it until it's pale and creamy, which usually takes a couple of minutes with an electric mixer. Add the powdered sugar gradually while beating so you don't create a cloud of sugar in your kitchen, then stir in the milk, vanilla, and salt until it's smooth and fluffy.
- Mix the cake and frosting:
- Crumble the cooled cake into a bowl and start adding frosting a little at a time, stirring until you have a texture that holds together but doesn't feel wet or greasy. This is where you figure out your own ratio because drier cakes need more frosting and moister cakes need less.
- Roll everything into balls:
- Using about a tablespoon of mixture per pop, roll them between your palms until they're nice and even, then place them on parchment paper. The more evenly sized they are, the better they'll dip and look when they're done.
- Chill the cake balls:
- Pop them in the fridge for at least an hour or the freezer for thirty minutes so they firm up and won't fall apart when you dip them. This step is non-negotiable if you want your sticks to actually stay in the cake balls.
- Secure those sticks:
- Melt just a tiny bit of your candy melts, dip the end of each stick in it, and push it about halfway into a cake ball. This little bit of melted candy acts like glue and keeps your sticks from spinning loose while you're dipping.
- Dip into color:
- Melt your candy melts according to the package directions and add a bit of shortening if you want thinner, smoother coating. Dip each pop into your chosen color, hold it there for just a second, then gently twist and tap off the excess so you don't get drips.
- Add the gold while it's wet:
- Immediately after dipping, sprinkle your gold sprinkles or glitter onto the wet coating so they actually stick. If the coating dries before you decorate it, the gold won't adhere the same way.
- Let them dry upright:
- Stick each pop into your Styrofoam block and let the coating harden completely, which usually takes fifteen to twenty minutes. Once they're fully set, you can package them or serve them immediately.
 Save
Save There's something almost meditative about standing at the counter dipping pop after pop into color, watching them transform from plain cake crumbles into these little jeweled treats. When the first batch of pops dried and I could actually pick them up by the stick without them falling apart, I genuinely felt like I'd accomplished something impressive, even though the whole process is actually pretty forgiving.
Choosing Your Colors
The beauty of this recipe is that you get to build something that represents the actual school or event you're celebrating. I spent a solid ten minutes at the store comparing candy melt colors to make sure I got the school colors exactly right, and I'm so glad I did because it made the pops feel truly personalized. You could also do alternating dips where half the pop is one color and half is another, or go wild with a marbled effect if you're feeling adventurous.
Dealing with Common Dipping Disasters
My first dip was way too thick and created this weird clump on the bottom, but then I figured out that adding the shortening really does solve that problem. I also learned that if you let your candy melts cool down too much between pops, they start to thicken up and create bumpy coatings, so keeping them warm is key. One funny moment was when I accidentally knocked a pop off its stick mid-dip and had to fish it out of the melted candy with a spoon like I was performing surgery.
Storage and Presentation
These pops will keep at room temperature for three days in an airtight container, or you can refrigerate them for up to a week if you're making them ahead. On the day of the event, I lined them up in the Styrofoam block with the sticks still in and just added a little tissue paper around the base for a polished presentation. A few other touches that made mine special include tying tiny ribbons around the sticks in school colors and arranging them in a box lined with crinkle paper.
- Make sure your container is truly airtight or the coating might get sticky from humidity.
- If you're transporting them, keep them in a cool spot because the candy coating can soften if they get too warm.
- You can make these up to a week in advance, so they're perfect for planning ahead for graduation parties.
 Save
Save These little cake pops turned out to be exactly the celebration touch that moment needed, and I love knowing I created something that actually meant something to people. If you're making these for your own graduation or school event, trust that you can absolutely nail it even if you've never made them before.
Recipe Guide
- → How do I ensure cake balls hold their shape?
Mix cake crumbs with enough frosting until the mixture is moist but firm. Chill well before shaping to help them stay intact.
- → What’s the best way to get a smooth candy coating?
Melting candy melts slowly and stirring in a bit of shortening creates a smoother dip and helps the coating set evenly.
- → Can I use other colors besides school colors?
Absolutely, feel free to customize the candy melts with any color combination to match your event or preference.
- → How long should the cake pops chill before dipping?
Chill the shaped cake balls in the refrigerator for at least an hour or freeze for 30 minutes to ensure firm coating.
- → How can I store cake pops to keep them fresh?
Store cake pops in an airtight container at room temperature for up to 3 days or refrigerate for up to a week.