 Save
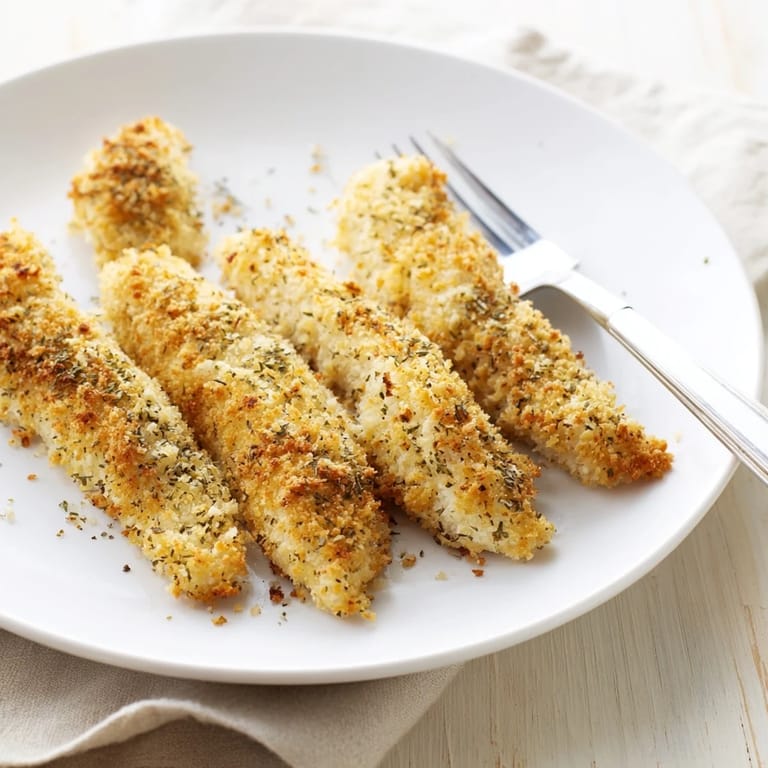
Save The smell of toasted panko always takes me back to that Thursday night when I was tired of the same old baked chicken routine. I had a bag of panko sitting in the pantry and wondered if I could actually get that crispy texture without a deep fryer. The first batch came out so golden and crunchy that my partner kept sneaking pieces off the baking sheet before I could even plate them. Now these strips are our go-to when we want comfort food that doesn't leave us feeling heavy. They've become the kind of recipe I don't even need to measure anymore.
I remember making these for a friend's birthday dinner and watching everyone reach for seconds before I'd even finished my first piece. There's something satisfying about hearing that crunch when someone bites into a strip you've made from scratch. One of my friends asked if I'd fried them, and when I said they were baked, she made me text her the recipe right there at the table. That night convinced me that oven-baked doesn't have to mean compromising on texture. It's become my secret weapon for impressing people without actually doing anything complicated.
Ingredients
- Boneless, skinless chicken breasts or tenders: Tenders are naturally the perfect size, but breasts work just as well when you slice them into even strips so everything cooks at the same rate.
- Salt and black pepper: Simple seasoning on the chicken itself ensures flavor all the way through, not just on the surface.
- All-purpose flour: This first coating helps the egg mixture stick and creates a base layer that keeps the breading from sliding off.
- Eggs: They act as the glue between the flour and panko, and whisking them well makes the coating process much smoother.
- Mayonnaise or Greek yogurt: Mixing this into the eggs adds richness and helps the panko adhere even better, plus it keeps the chicken moist inside.
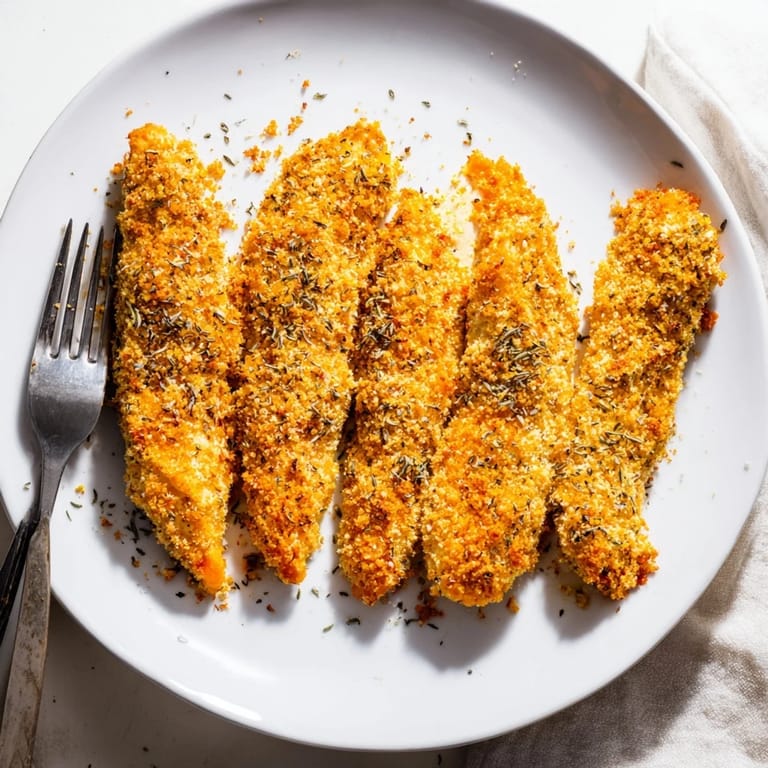
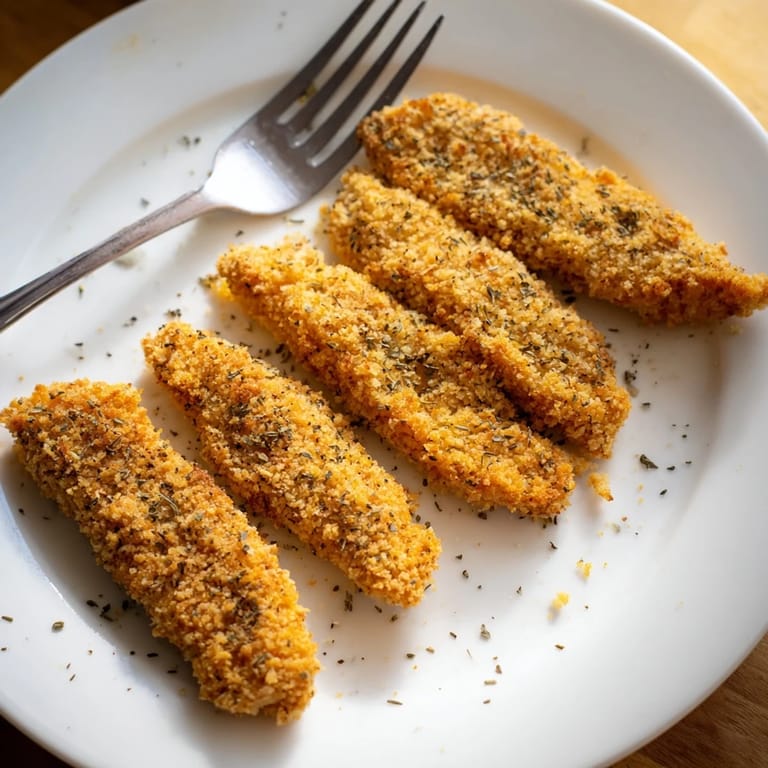
- Panko breadcrumbs: The secret to that extra-crispy texture, panko has larger, airier flakes than regular breadcrumbs and they toast up beautifully in the oven.
- Dried Italian herbs: A blend of oregano, thyme, and basil brings warmth and depth without overwhelming the chicken.
- Garlic powder: Adds a savory backbone that complements the herbs and makes the whole kitchen smell amazing while they bake.
- Smoked paprika: Just a hint gives the coating a subtle smoky flavor and a gorgeous golden-red color.
- Cayenne pepper: Optional, but a small pinch adds a gentle kick that balances the richness of the breading.
- Olive oil: A light drizzle or spray before baking helps the panko crisp up and turn that perfect shade of golden brown.
Tired of Takeout? 🥡
Get 10 meals you can make faster than delivery arrives. Seriously.
One email. No spam. Unsubscribe anytime.
Instructions
- Prep the oven and baking sheet:
- Preheat your oven to 220°C (425°F) and line a baking sheet with parchment paper, or better yet, set a wire rack on top for air circulation that crisps every side. This step makes cleanup easier and prevents soggy bottoms.
- Prepare the chicken:
- Pat the chicken completely dry with paper towels, then slice it into strips about 2 cm wide so they cook evenly. Season both sides with salt and pepper right away so the flavor soaks in.
- Set up your breading station:
- Arrange three shallow bowls in a row: one with flour, one with eggs whisked together with mayonnaise until smooth, and one with panko mixed with all the herbs and spices. This assembly line makes coating each strip fast and tidy.
- Coat the chicken:
- Dredge each strip in flour and shake off the excess, dip it into the egg mixture to coat completely, then press it into the panko mixture and turn to cover all sides. The key is to press gently so the panko really sticks.
- Arrange and oil:
- Place the coated strips on your prepared baking sheet with a little space between each one so they crisp instead of steam. Drizzle or spray them lightly with olive oil to help the panko turn golden and crunchy.
- Bake and flip:
- Bake for 18 to 22 minutes, flipping the strips halfway through so both sides get evenly crispy. They're done when the coating is deep golden and the internal temperature hits 74°C (165°F).
- Rest before serving:
- Let the strips cool on the baking sheet for 2 to 3 minutes before serving. This brief rest lets the coating set and stay extra crispy when you bite in.
 Save
Save One evening I made a double batch of these and set out three different dipping sauces just to see what would happen. My niece, who usually picks at her food, ate four strips dipped in honey mustard and declared it better than any restaurant. Watching her enjoy something I'd made from scratch felt like a small victory. That night reminded me that food doesn't have to be fancy to bring people together, it just has to taste good and make everyone feel at home.
Serving Suggestions
These strips are incredibly versatile and pair beautifully with almost anything you have on hand. I love serving them with a simple green salad dressed in lemon vinaigrette to cut through the richness, or alongside roasted sweet potato wedges for a hearty plate. For dipping, honey mustard is a classic, but spicy sriracha mayo or creamy ranch both work wonderfully depending on your mood. If you're feeding a crowd, set out a few different sauces and let everyone choose their own adventure. They also make fantastic leftovers tucked into a wrap with lettuce, tomato, and a drizzle of your favorite dressing.
Customization Ideas
This recipe is forgiving and loves to be tweaked based on what you have or what you're craving. If you want a cheesy twist, stir a handful of grated Parmesan into the panko mixture for extra savory depth. For a gluten-free version, swap in gluten-free panko and flour, the texture stays just as satisfying. You can also play with the spice level by adding more cayenne, or switch out the Italian herbs for a Cajun seasoning blend if you're in the mood for something bolder. I've even used this same method with fish fillets and it worked beautifully, so don't be afraid to experiment.
Storage and Reheating
Leftovers keep well in an airtight container in the fridge for up to three days, though in my house they rarely last that long. When you're ready to reheat them, skip the microwave because it'll make the coating soggy. Instead, pop them back in a 200°C (400°F) oven for about 8 to 10 minutes until they're warmed through and crispy again. If you want to freeze them, arrange the cooked strips on a baking sheet until frozen solid, then transfer to a freezer bag for up to two months.
- Store in the fridge for up to three days in an airtight container to keep them fresh.
- Reheat in the oven at 200°C (400°F) for 8 to 10 minutes to restore the crunch.
- Freeze cooked strips on a baking sheet first, then bag them for up to two months and reheat straight from frozen.
 Save
Save These crispy panko chicken strips have earned a permanent spot in my weeknight rotation, and I hope they find a place in yours too. There's something deeply satisfying about pulling a pan of golden, crunchy chicken out of the oven and knowing you didn't need a fryer to make it happen.
Recipe Guide
- → How do I ensure the chicken strips stay crispy?
Pat the chicken completely dry before breading, as moisture prevents crispiness. Use a wire rack on your baking sheet for air circulation underneath, and drizzle with olive oil rather than brushing. Flip halfway through baking and allow 2-3 minutes cooling time after removing from the oven.
- → Can I prepare these ahead of time?
Yes. Bread the chicken strips up to 4 hours in advance and refrigerate on the baking sheet covered with plastic wrap. You can also freeze breaded strips for up to 2 months. Bake directly from frozen, adding 5-7 minutes to cooking time.
- → What's the best way to check if chicken is fully cooked?
Use a meat thermometer to verify the internal temperature reaches 74°C (165°F) at the thickest part. Alternatively, cut into the largest strip—juices should run clear with no pink inside. Cooking time may vary based on strip thickness.
- → How can I make this gluten-free?
Substitute all-purpose flour with a gluten-free flour blend and use certified gluten-free panko breadcrumbs. Check your mayonnaise or yogurt label for gluten. The herbed seasonings and cooking method remain unchanged.
- → What dipping sauces pair well with these strips?
Honey mustard provides classic sweetness, ranch offers cooling creaminess, and spicy sriracha mayo adds heat. For a lighter option, try Greek yogurt mixed with lemon juice and dill. Barbecue sauce and sweet chili sauce also complement the herb-forward panko coating.
- → Can I use Greek yogurt instead of mayonnaise?
Absolutely. Greek yogurt works as a 1:1 substitute for mayonnaise in the egg dip and creates a lighter, tangier coating. It also provides added protein and works well for dairy-free preparations when using dairy-free yogurt alternatives.