 Save
Save My daughter came home from school buzzing about a science project on space, so I raided the cheese drawer looking for something that could spark her imagination at snack time. I started laying out wedges of sharp cheddar like puzzle pieces, and suddenly I could see it—a sleek little rocket ready for takeoff. She helped arrange the strawberry flames, and that 15 minutes turned into the kind of kitchen moment where the snack became less important than the shared laugh when a wedge tumbled sideways.
The real test came when I made it for a birthday party and watched a shy kid in the corner immediately perk up and ask to help dismantle it piece by piece. That's when I realized the Retro Rocket isn't just about nostalgia for classic snack trays—it's permission to be playful with food, to make something that doesn't take itself seriously.
Ingredients
- Sharp cheddar cheese (200 g), cut into pointed wedges: The backbone of your rocket, and the sharper the better—mild cheese doesn't have the personality this design needs.
- Cream cheese (100 g, optional): Your secret structural adhesive that keeps wedges from sliding around if your platter isn't perfectly level.
- Fresh strawberries (200 g), hulled and sliced lengthwise: These create those gorgeous scarlet flames, and slicing lengthwise gives you longer pieces that fan out more dramatically than halves.
- Black olives, sliced (1 tablespoon, optional): Small oval windows that give your rocket personality and a little salty contrast to the richness of cheese.
- Fresh mint leaves (1 tablespoon, optional): A whisper of green that breaks up the color palette and adds a gentle freshness if anyone wants to nibble them.
- Carrot sticks (2–3 thin ones, optional): These become the side fins, adding a natural orange that complements the strawberry flames without competing.
Tired of Takeout? 🥡
Get 10 meals you can make faster than delivery arrives. Seriously.
One email. No spam. Unsubscribe anytime.
Instructions
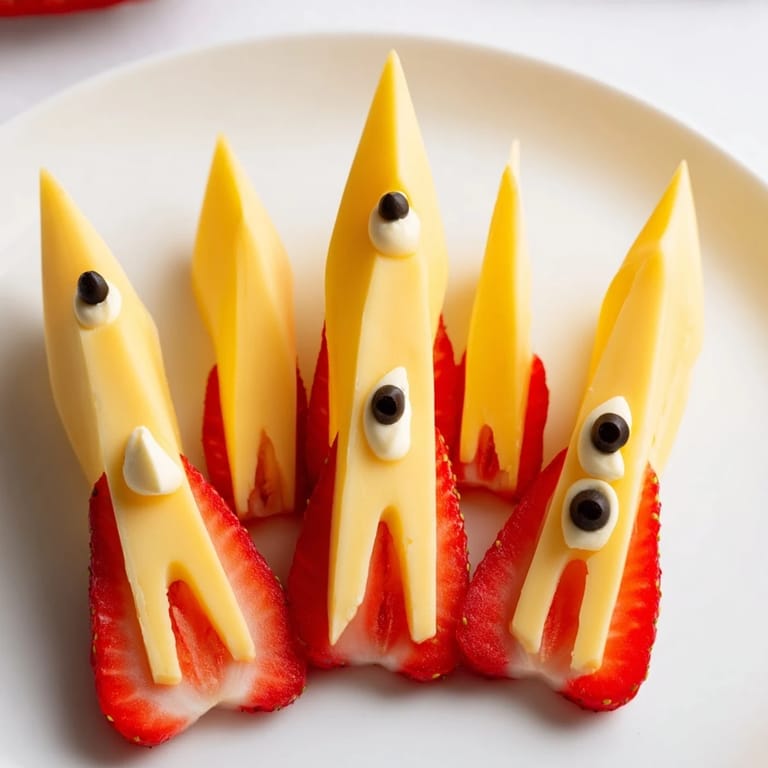
- Build your rocket body:
- Lay out your cheese wedges on the platter in a pointed formation, overlapping them slightly like roof shingles—this keeps everything stable and creates that sleek rocket silhouette. If you're nervous about the structure, a tiny dab of cream cheese between wedges acts as edible glue without anyone noticing.
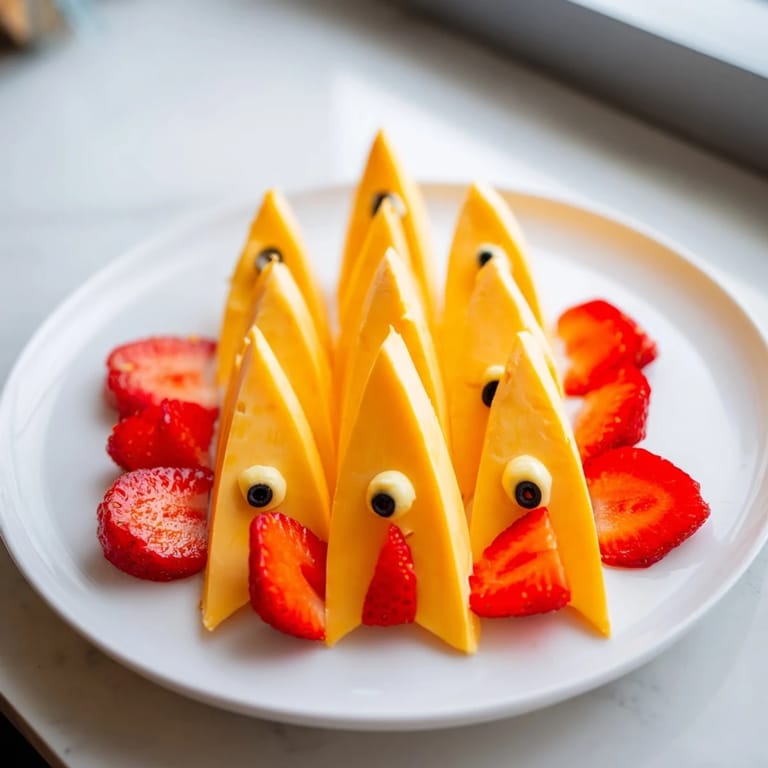
- Create the flame effect:
- Arrange your strawberry slices in a fan pattern at the base, letting them overlap and radiate outward as if the rocket is lifting off. The messier and more energetic the arrangement, the more dramatic the effect.
- Add character with details:
- Scatter black olive slices across the cheese body like windows, or tuck them into crevices for a sense of depth and detail. This is where the rocket stops being just a shape and starts feeling like a vehicle.
- Finish with fins and garnish:
- Lean carrot sticks against the sides as stabilizer fins, and scatter mint leaves for color if you want them. These aren't strictly necessary, but they make the whole thing feel intentional rather than improvised.
- Chill and serve:
- You can serve immediately if you're hungry, or cover loosely and refrigerate until party time—the cheese softens slightly in the cold, which somehow makes the wedges easier to share.
 Save
Save What started as a quick distraction from homework became a memory my daughter still talks about months later, not because the food was fancy, but because we built something together with our hands and then got to dismantle it laughing. That's the real magic of this one.
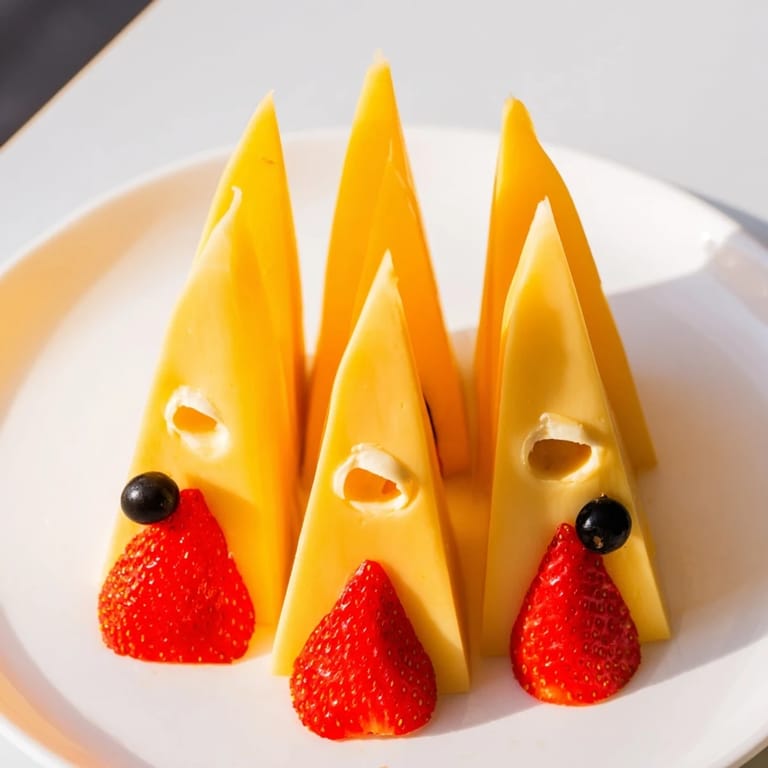
Playing with Cheese Shapes and Varieties
Once you understand the basic rocket structure, the door opens to creative riffs that cost nothing extra. A mild Gouda creates a softer golden tone that feels warmer, while Swiss cheese's holes add accidental texture and visual interest. I've tried combinations of three different cheeses—sharp cheddar, Gouda, and Brie—layered to create a gradient that looks almost intentional, like you studied design. The shape doesn't have to be perfect; what matters is that the wedges feel cohesive, so stay in the same flavor family rather than mixing wildly different cheeses that compete for attention.
Swapping the Flames for Seasonal Color
Strawberries are the classic choice, but I've had excellent results with mango slices in summer—they're softer and create these deeper orange flames that somehow look even more ethereal. Orange slices (segmented, not just rings) work beautifully too, and raspberry fans create a darker, more sophisticated effect if you're serving this to adults. The fruit should be ripe enough to be sweet but firm enough not to weep juice across your cheese by the time people eat it, so taste as you go and refrigerate if you're making this more than an hour ahead.
Presentation Tips and Storage Ideas
A large white platter makes the colors pop like they're glowing, while a dark slate or wooden board gives the whole arrangement a more earthy, sophisticated feel. The rocket can sit out at room temperature for up to two hours before the cheese starts to soften too much, though if your kitchen is warm, keep an eye on it. If you're making this ahead, assemble everything except the strawberries, cover it loosely, and refrigerate—add the fruit flames 20 minutes before serving so they stay perky and don't release their juice into the cheese.
- Cut your cheese wedges ahead of time and store them in an airtight container if you want to prep the night before—this cuts assembly time to pure arrangement on party day.
- Use a sharp, slightly damp knife to cut clean wedges; a dull blade crushes the edges and makes the cheese look ragged.
- If you're feeding a crowd, you can make two smaller rockets instead of one large one, which actually looks more dynamic on a buffet table.
 Save
Save The Retro Rocket proves that food doesn't need to be complicated to be memorable; sometimes the best moments happen when you give yourself permission to be a little silly in the kitchen. Make it, share it, and watch people's faces light up.
Recipe Guide
- → How do I keep the cheese wedges stable?
Gently overlap the wedges and use small dabs of cream cheese between them to hold the shape securely.
- → Can I substitute the strawberries?
Yes, mango or orange slices work well to create a similar flame effect at the base of the rocket.
- → What cheeses work best for this snack?
Sharp cheddar is ideal for the body’s pointed wedges, but Gouda or Swiss can be used to add color variety.
- → How to add decorative details to the rocket?
Use black olive slices to mimic windows and carrot sticks as fins for extra visual appeal.
- → Is this snack suitable for gluten-free diets?
Yes, the main ingredients are naturally gluten-free, but check any accompaniments like crackers if used.